Gardening Hacks
- Gardening Expert and Host of Growing a Greener World®May 7, 2022
Joe’s Gardening Hacks to Save Time, Energy, and Resources
As much as I enjoy spending time in my garden, I’m always looking for a better or more efficient way to accomplish those repetitive tasks that can start to feel like a drag. Sometimes I get that lightbulb moment and — voila! — it comes to me. Here are a few of my favorite gardening hacks, to save you time, energy, and even precious resources in and around the garden.
More Efficient Watering
The Quick Fill Deep Dunk
This one came to me when I was watering dozens of seed trays inside. The watering can is only so big, so it doesn’t take long before you’re empty again and heading back to the water source, and waiting for what seems like hours for the watering can to fill back up. And then having to repeat this process over and over again. Suffice it to say, the most time-consuming task of seed starting and seedling care was standing at the faucet waiting for that can to refill.
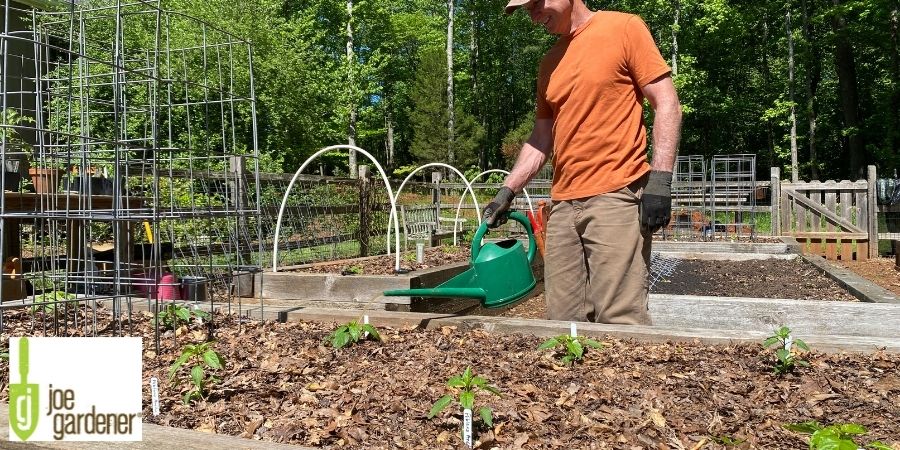
No more! Now I fill a 36-quart giant flexible plastic tub from a hose in just a minute, and I use that tub of water to quickly refill my watering can. It’s simply a matter of submerging the watering can into the tub, and seconds later, I am back in business! Doing the math, a 9-gallon tub will allow me to refill my 1.5-gallon can six times without having to turn the spigot on and off again. That is a huge time saver!
This method has really improved my gardening efficiency while applying fertilizer. Rather than mixing in liquid concentrate organic fertilizer every time I fill a watering can, I pre-measure concentrate for the entire tub. Now I spend much less time measuring and mixing and have more time to do what I love doing in the garden.
Automatic Timer
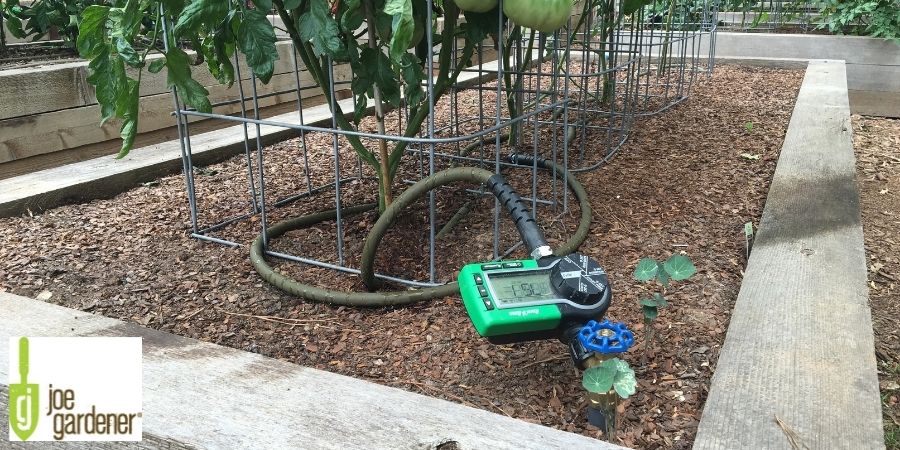
This one’s not necessarily a “hack,” but if you aren’t using simple portable timers to put your watering on autopilot, you’re missing out on a great opportunity to outsource your watering duties. This works best for drip irrigation and soaker hoses, where you want the water to come on for specific amounts of time on the days of the week you specify. With automatic timers, you never miss a watering session, you never overwater, and you never have to worry about forgetting to turn off the hose when the watering is done. For less than $40, you can have your own battery-operated timer ready to go in a matter of minutes. Not to mention the peace of mind in knowing your watering is getting done when you’re off on vacation in the middle of summer.
Hose-end Shutoff Valve
Yes, a simple $7 brass adapter screwed onto the end of your hose can save you about 10,000 steps a month in your garden. OK, I don’t know if that’s really true, but imagine having the ability to shut your water off from the hose end, wherever you are, rather than running back to the spigot every time you need to shut it off or change attachments. Enter the lowly but oh so important hose-end shutoff valve. A simple twist of the lever opens and closes the valve, allowing a controlled flow or full throttle, all within arm’s reach. I know this sounds so simple, but until you have this on every hose in your yard and garden, you just can’t appreciate the joy you will experience with this simple, inexpensive but essential device in your gardening arsenal.
Mulch & Compost
Electric Leaf Shredder
Two things I can’t have enough of in my garden and landscape are shredded leaf mulch and compost, and there is one device that helps me make an abundance of both. For an investment of about $150, you can easily shred leaves for years to come. Most electric leaf shredders will shred the leaves down to about 10% of their original volume — perfect for fitting them all into a simple wire-fence leaf corral. Over about five months, they will break down to a semi-composted state — perfect for spreading as mulch over any garden bed.
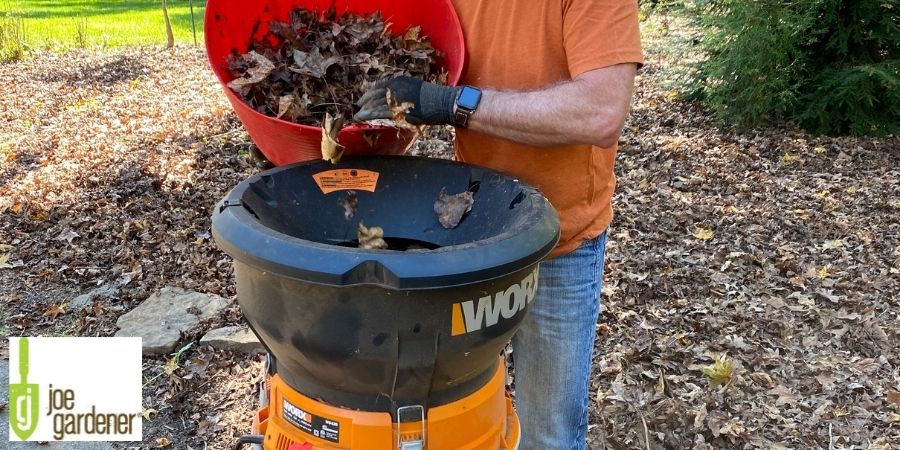
What’s leftover in the corral will continue to biodegrade over another six months or so into rich, dark compost, which you can then use anytime, anywhere for making any soil better. It’s a 2-for-1 deal that just keeps on giving, season after season. I’ve spent a lot of money over the years on gardening gear and gadgets, and this is one of my all-time best investments ever!
Critter Cover
Plastic mesh
You’ve seen it before, but usually in fluorescent orange on the side of the road during construction and maintenance projects. That’s the stuff I’m talking about — just not in bright orange. That same plastic mesh fence also comes in dark green or black, and by the roll. For me, it’s the perfect thing to cut to lay directly on top of the soil in my garden beds or over a wood frame. Either way, it's the easiest thing I’ve found to prevent foraging critters like squirrels and chickens from digging through my newly planted seedbed for their next snack. It also stops my barn cats from using that big open bed as their personal litter box.
After cutting the mesh down to size, I pin it down securely with coat hangers cut in a “U” shape. You can also use pins that are designed for securing row cover. When the mesh is no longer needed, I fold it up and store it until I’m ready to use it again, when it will be already cut to size and ready to go down in 2 seconds.
The plastic mesh can obstruct germinating seeds, so check on the bed often. To give the emerging seedlings some room to grow before the mesh has to be removed, you can suspend the mesh above the soil on wood frames or the edges of the garden bed.
Why I didn’t think of this sooner, I don’t know. But now that I have them, they are a staple in my garden for several months each year.
Space-saving Seed Starting Hack
Densely Planting Seeds
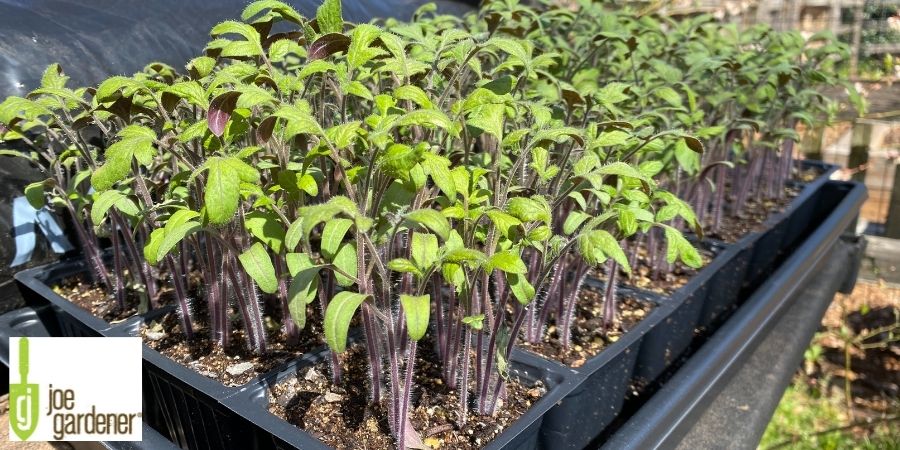
If you start seeds indoors, there’s a good chance you never have enough room for all those seed trays. I feel your pain. The game-changing solution to that is a technique of densely planting dozens of seeds in a single cell of your much larger cell tray. Believe it or not, you don’t have to sow just one, two or three seeds in a given cell. You can sow dozens, and they will all be fine. Hard to believe, I know, but it works.
The beauty of this technique is that you can grow literally dozens of varieties of plants in a single seed starting tray. About 4 weeks after they germinate, you’ll need to divide them. That’s where the tradeoff comes into play. Although you saved a ton of space during the first 4 weeks, now you have to find more room for the exponentially expansive supply of seedlings you will need to pot up. Hopefully, by this time, you can move them outside into a space that allows for the extra room needed. But if this sounds appealing to you, I encourage you to give it a try. I start most of my seeds this way, and I am totally spoiled by this technique. It saves me lots of room in the beginning, I’m not using nearly as many grow lights, and I have fewer trays to water! I’m sold, and you may be too.